Xi'an Terracotta Warriors: Photography Rules and Best Viewing Angles

If you go to the Terracotta Warriors with the wrong expectations, you will probably come home with the same flat, crowded shots that every rushed visitor takes: one wide frame from the first rail, a few awkward close-ups, and a memory of trying not to block the next person. If you go with a plan, though, the site is much more rewarding. The pits are large, the light changes with position, and the best images come from moving slowly, reading the space, and respecting the rules that protect the artifacts.
This guide focuses on the practical side of the visit: what photography is normally allowed, how to think about angles inside each pit, what the current visit flow looks like, and how to avoid the mistakes that make a famous site feel frustrating. It is written for travelers who want better photos without turning the visit into a photo-production exercise.
Photography rules at the Terracotta Warriors
The simplest way to think about photographing the Terracotta Warriors is this: treat the site like a major indoor heritage museum, not like an open-air attraction. You can usually take personal photos for your own use, but you should expect close supervision, restrictions on disruptive gear, and a strong expectation that you will not block anyone else's view.
The headline rules are straightforward:
- Do not use flash on the warriors or on painted surfaces unless staff explicitly say it is allowed.
- Keep tripods, monopods, and other bulky support gear to the side unless the museum has clearly approved them for a specific area.
- Do not cross barriers, lean over rails, or step into lines of viewing traffic to get a better angle.
- Move efficiently. The site is crowded for a reason, and lingering in the wrong spot will make your photos worse, not better.
The more important rule is the one people forget: your best photo is rarely the first photo. The Terracotta Warriors are layered, repetitive, and partially enclosed, which means angle matters more than distance. A slightly higher viewpoint, a few steps to the left, or a stronger diagonal can change a shot from documentary to dramatic.
If you are building a wider China itinerary around Xi'an, practical planning is easier when you think about the trip as a sequence. China Travel Planning: Visa, WeChat Pay, High-Speed Rail & Practical Guide will help with the basics that make the museum day smoother, while Chinese Culture Guide: Customs, Etiquette & Dos and Don'ts for Travelers is useful for understanding why the museum experience works the way it does. If you want inspiration for how to handle other heritage and city scenes in the country, Best Photography Spots in China: Ancient Towns to Modern Skylines is a useful companion read.
What you can usually do
At a normal visit, most travelers can take handheld photos throughout the main visitor areas. That means the standard "walk, pause, frame, and continue" style works well. A compact camera or phone is the safest choice because it keeps you mobile and less conspicuous. If you like shooting in manual mode, the site rewards a medium focal length and a patient approach more than dramatic ultra-wide distortion.
The best use of your camera at the Terracotta Warriors is not to chase one perfect hero image. It is to create a sequence:
- A wide establishing shot that shows the pit as a whole.
- A medium shot that captures rows, spacing, and depth.
- A tight frame that isolates one figure, one wheel mark, one weapon detail, or one viewing angle that feels especially graphic.
That sequence tells the story of the site much better than one giant photo from the center rail.
What to avoid
Even when the site is accommodating, there are a few ways visitors make photography harder than it needs to be:
- Flash can flatten the scene and may be rejected by staff in indoor areas.
- Big lenses and heavy support gear slow you down in crowded lanes.
- Standing in the center of a railing gap for too long makes the whole area congested.
- Chasing portraits with the warriors in the background usually wastes the best light.
In other words, the rules are not there to punish photographers. They exist because the site is a working museum and a major conservation environment. If you stay light, move deliberately, and keep your gear simple, you will get more opportunities than the person trying to build a mini studio beside the rail.
Why the site photographs differently from most attractions
The Terracotta Warriors are visually powerful because they are not a single object. They are an archaeological field arranged in layers, with sightlines that change as you move. That matters because the best angle is often not the most frontal one. It is the angle that gives the figures rhythm, depth, and scale.
At many attractions, a center-composition frame works immediately because the subject is designed to be seen from one direction. Here, the trench itself is part of the composition. The trench edges, the roof structure, the museum lighting, and the density of the figures all affect the final image. For that reason, the stronger photo often comes from a slight offset: not dead center, but one or two steps away from center, with the line of warriors receding diagonally.
If you are using a phone, this is good news. Phones are excellent at quick reframing and at capturing a small amount of available light without forcing you into a complicated setup. If you are using a camera, this is even better news because you can choose a focal length that compresses the ranks of figures and makes the trench feel fuller.
Best viewing angles for each pit
The best viewing angle at the Terracotta Warriors depends on which pit you are standing in and what kind of image you want. The site is not a single viewpoint attraction. It is a sequence of spaces, each with a different mood, footprint, and visual structure. If you understand that, you can stop fighting the crowd and start working with the geometry of the place.
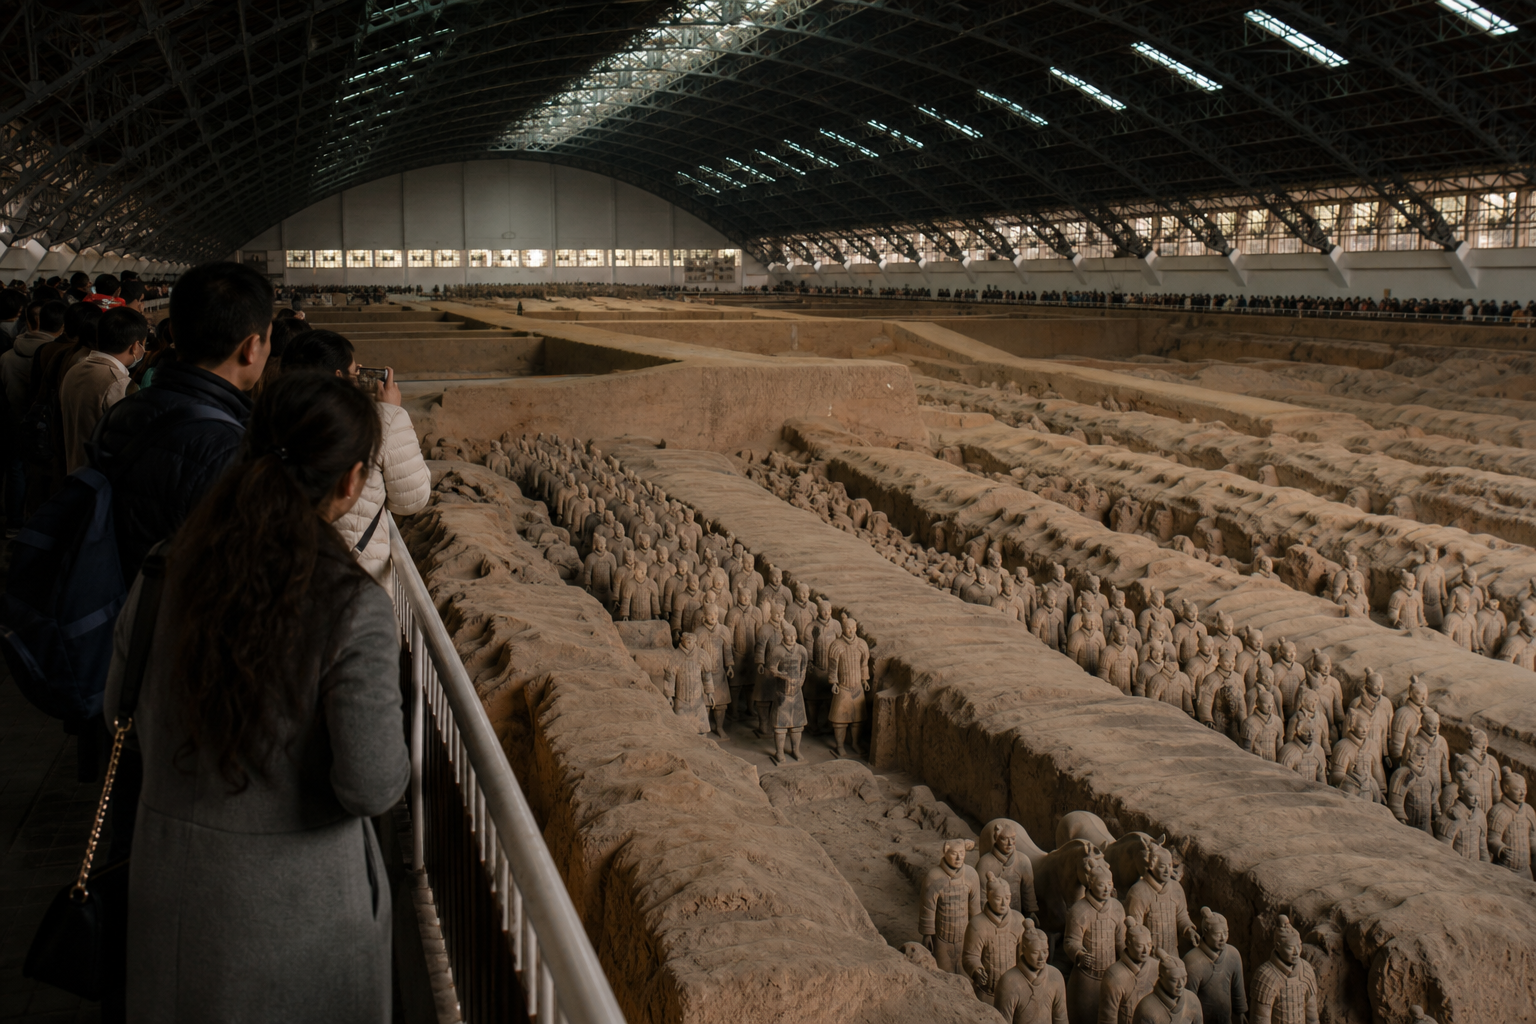
Pit 1: the classic wide frame
Pit 1 is where most people form their mental image of the Terracotta Warriors. It is the biggest pit and the one that gives you the long, ordered lines that made the site famous. For a first visit, the default viewpoint is usually the central overlook, because it gives you the strongest sense of scale.
That said, the central overlook is not the only useful shot. Once you have taken the obvious wide frame, shift a little toward the left or right side of the platform. A small lateral move changes the angle of the trench roof, creates stronger diagonals in the rows of figures, and can separate your image from the generic postcard view.
For Pit 1, try these approaches:
- Start with a wide establishing shot from near the center to show the mass of figures.
- Move to one side of the platform and use the trench edge as a leading line.
- Look for a section where a foreground figure is more isolated from the rest and use it as an anchor.
- Take one frame with people included only if they help show scale, then take a cleaner frame without them.
The strongest Pit 1 photo is rarely the one with the most detail. It is the one that makes the viewer feel the size of the excavation and the order of the army. A slight compression effect from a modest telephoto lens often helps, because it makes the ranks look denser and more architectural.
If you are shooting on a bright day and the hall is evenly lit, keep your exposure conservative. The pit is visually busy enough. You do not want overexposed floors or washed-out highlights competing with the figures.
Pit 2: the layered, more varied frame
Pit 2 is more complex visually. It tends to feel less like a single sweeping panorama and more like a set of separate scenes inside the same archaeological story. That makes it excellent for travelers who want a photo that feels less obvious and more textured.
The best angle in Pit 2 is usually one that emphasizes layers. Instead of trying to flatten the entire space into one broad image, look for a position where a partial row of figures appears in front of another row, with the trench architecture sitting behind them. This creates depth and gives the frame more tension.
In Pit 2, pay attention to:
- The edge of the platform, which can be used as a strong foreground line.
- The contrast between completed figures and partially excavated sections.
- The way light falls on helmets, shoulders, and horse forms.
- Small gaps between viewing positions where you can isolate detail without crowd interference.
This is also the best place to slow down and make more intentional close-ups. If you only shoot wide here, you miss the point. The visual interest comes from the partial reveals: a soldier half-turned, a horse head with a visible line of armor, a grouping that shows how the army was organized, or a section where the excavation feels like a frozen working site rather than a finished display.
If you are composing on a phone, use your feet instead of digital zoom. A few steps to the side usually produce better depth than pinch-zooming from the same place. If you are using a camera, a short telephoto lens can isolate a cluster of figures and turn the trench into a textured background.
Pit 3: the compact, intimate frame
Pit 3 is the smallest of the commonly visited pits and, visually, the easiest to overcomplicate. Because the space is tighter, people often stand too far back and try to make it look bigger than it is. That usually produces a flat, cramped frame.
The better approach is to treat Pit 3 as an intimacy shot. It is the place for structure, not spectacle. Focus on symmetry, the relationship between the excavated trench and the figures, and the feeling that you are looking at an important command space rather than a battlefield scene.
Useful approaches in Pit 3 include:
- A centered image that emphasizes the formal order of the space.
- A slightly off-center frame that uses the trench walls to create a box-like geometry.
- A detail-oriented shot that shows the figures as a group rather than as individuals.
Because Pit 3 is smaller, it is easier to make the image too cluttered. Simplify hard. Let one structural element lead the viewer's eye: the edge of the excavation, a roof beam, a change in light, or the clustering of figures themselves. The best Pit 3 photo feels controlled.
The museum displays and transition spaces
Most visitors think only about the pits, but the surrounding museum and transition spaces can be excellent for photography too. The hallways, signage, preserved details, and any chariot or artifact displays often provide cleaner compositions than the crowds inside the pits.
These spaces are useful for three reasons:
- They give you breathing room after the more crowded pit view.
- They let you photograph details that are impossible to isolate from the platform.
- They help you make a photo story that feels complete instead of repetitive.
When you leave the main pit area, look for visual variety. A detail of a warrior's face, a reconstructed fragment, a museum label that adds context, or a transitional corridor can all break up the sequence of wide trench shots. If you are writing a travel story, these small images are often the ones that make the piece feel lived-in instead of purely observational.
Best angles for different types of travelers
Not every visitor wants the same image. The right angle depends on the story you are trying to tell.
- If you are a first-time visitor, take the iconic center-wide frame first, then add one side-angle shot and one close detail.
- If you are a serious photographer, come for structure, layers, and a controlled sequence of framing changes rather than for one dramatic postcard frame.
- If you are traveling with family, get your people shot early, before the crowd becomes impatient, and then separate the family portrait from the artifact photos.
- If you are building a social-first travel post, mix one recognizable wide shot with tighter images that show texture, scale, and personal reaction.
The key is to avoid treating the whole site like a single viewpoint. There is no one right answer. The strongest image is the one that matches your purpose.
Practical guide
The practical part of visiting the Terracotta Warriors matters because the site is popular enough that small logistics issues quickly become big ones. If you arrive late, book the wrong ticket type, or misunderstand the entry flow, you will lose time that should have gone to the pits, not to waiting in a queue.
Hours and admission
The site usually operates on a daytime visitor schedule, and recent public visitor information has commonly placed opening hours around 8:30 to 18:00, with entry controlled by ticket time slots rather than casual walk-up admission. That means your planned arrival matters more than it would at a neighborhood museum.
For admission, expect a real-name reservation system and timed entry. Ticket products can change, and some seasons or combinations include different access levels, so it is smarter to verify the final price while booking than to rely on a static screenshot from a past trip report. In recent years, adult admission has typically been in the low triple-digit RMB range for the core site, but you should confirm the exact amount when you choose your date and ticket type.
The practical takeaway is simple: the Terracotta Warriors are not a spontaneous, turn-up-and-decide attraction. They are a booked visit with a queue structure attached. Build your day around that.
How to get there
The museum is in Xi'an's Lintong area, east of the city center, so the trip is short enough for a half-day visit but long enough that transport choice matters.
Common ways to get there include:
- Taxi or ride-hailing from central Xi'an, which is the simplest option if you want to control timing.
- Metro plus local transfer, which can work well if you are comfortable changing from city transport to a local bus or short ride at the end.
- Dedicated tourist coach or packaged transfer, which is useful if you want the trip to be low-effort and do not want to manage navigation.
- Private driver or hotel-arranged car, which is the easiest option for travelers who want to combine the Terracotta Warriors with Huaqing Palace or another nearby stop.
If your priority is photography, the most important thing is not the transport method itself. It is the arrival time. Getting there early enough to move through the pits before the most crowded window gives you both better photographs and a calmer visit.
Booking and entry flow
Treat the entry process as part of the visit, not a nuisance. You will usually be asked for identification, and in practice that often means carrying the same passport information you used when booking. If you are traveling as a family or a mixed group, make sure every traveler is booked under the right name and date.
A smooth entry flow usually looks like this:
- Book the correct date and time slot in advance.
- Arrive with enough buffer to pass security without rushing.
- Keep your passport and booking confirmation easy to access.
- Enter the pits with a simple plan for the first ten minutes so you do not waste your best light.
The biggest mistake is to treat the first overlook as the final composition. That is how people end up taking one hurried frame and moving on. Instead, spend the first few minutes identifying where the crowd is thick, where the platform is open, and which direction will let you get a cleaner angle after the initial rush.
What to bring
You do not need a full studio kit. The site rewards restraint.
Recommended items:
- A phone or a small camera body.
- A lens that can handle a normal to short-telephoto range.
- A spare battery or power bank.
- Comfortable shoes, because you will stand and shift position more than you expect.
- A light bag that keeps your hands free.
Items that are usually more trouble than they are worth:
- Large tripods.
- Overly ambitious lens swaps in crowded zones.
- Heavy backpacks that slow you down.
- Fancy gear that makes you hesitant to move when a better angle opens up.
The simplest equipment is often the best equipment for a site like this because the experience is part photography and part crowd management.
Tips and common mistakes
The difference between a good visit and a frustrating one is often a handful of small decisions. Most visitors do not fail because they lack technical skill. They fail because they misunderstand the site and the rhythm of the crowd.
What most guides miss
Most guides talk about the Warriors as if they were a single visual object. That is the wrong mental model. The site is better understood as a sequence of thresholds:
- Arrival and security.
- First reveal.
- Main pit overlook.
- Side-angle exploration.
- Detail capture.
- Exit and reset.
Once you think this way, the visit becomes easier to pace. You are not trying to "get the photo" in one shot. You are building a set of images that together explain what makes the place important.
Another thing many guides miss is that the emotional temperature of the visit changes. At the beginning, visitors are excited and noisy. Later, they settle down and start paying attention. If you can wait until the first excitement passes, you often get cleaner frames and a calmer atmosphere.
The final thing most guides miss is that context matters. The Warriors do not exist just as a visual attraction. They are part of a larger Xi'an and China story: imperial power, archaeological preservation, museum behavior, and the practical reality of modern tourism. The better your general travel planning and cultural awareness, the more smoothly the visit goes.
Insider advice for better images
The following small habits make a visible difference:
- Take your first photo quickly, but do not stop there. Use it as a baseline.
- Shift position after every major frame.
- Try one image with a human figure for scale, then one without anyone in the frame.
- Use the trench edges and roof structure as compositional tools.
- Revisit the same overlook once the nearby crowd changes.
These habits are simple, but they matter. At a site as famous as this, the visual difference between "I stood here" and "I looked carefully" is surprisingly large.
Common mistakes to avoid
- Arriving too late and trying to photograph in the most crowded window.
- Using flash or trying to force dramatic lighting in a museum environment.
- Shooting only the center-wide frame and assuming the job is done.
- Focusing so much on the warriors that you ignore the architecture of the pit.
- Treating the visit like a checklist rather than a visual experience.
The last mistake is subtle but important. If your only goal is to say you saw the Terracotta Warriors, the visit can feel rushed. If your goal is to understand how the site looks from different positions, it becomes more memorable and much more photogenic.
When to slow down
There are two moments when you should deliberately slow your pace.
The first is immediately after the initial reveal. Many travelers take one quick photo and keep moving, but that is the moment when you should pause and read the space. Stand still long enough to notice how the crowd shifts and where the strongest line of sight opens up.
The second is near the end of the visit, when the obvious shots are already in your card or camera roll. This is when you can look for details: a partial profile, a tool mark, the shape of a horse, a hand, a face, or a repeated line that turns the pit into a pattern instead of a one-off attraction.
FAQ
Can I take photos at the Terracotta Warriors?
Yes, personal photography is generally part of the visit, but you should follow museum rules and staff instructions. Expect standard museum-style limits, especially around flash and bulky equipment.
Are tripods allowed?
Do not assume they are. Even when a tripod is technically possible in some spaces, it is often impractical in crowded viewing areas. A small handheld setup is usually the better choice.
What is the best time of day for photography?
Early in the day is usually the most forgiving because the crowds are smaller and you have a better chance of getting a clear line at the overlook. If your schedule forces a later visit, use side angles and details to avoid relying only on the most crowded center view.
How long should I spend there?
Most travelers should allow at least half a day if they want to see the main pits without rushing. If you are serious about photography, build in more time so you can return to an overlook after the crowd pattern changes.
Is the Terracotta Warriors visit worth it if I am not a photography fan?
Yes. The site is still compelling if you are only there to see the archaeology. But if you do care about photography, the visit becomes even better because the setting rewards patience, restraint, and careful framing.
Conclusion
The Terracotta Warriors are one of those rare places where the best experience comes from combining cultural respect with visual patience. If you arrive with a light kit, understand the usual photography rules, and think in terms of angles instead of only subject matter, you will get far better results than the average visitor.
Use Pit 1 for the iconic scale shot, Pit 2 for layered depth, and Pit 3 for a more controlled, intimate composition. Keep your equipment simple, stay aware of the crowd, and treat the site like a living museum rather than a quick photo stop. If you do that, the visit will feel less like a queue and more like a story you are able to document well.
For Xi'an specifically, the lesson is the same one that applies across China travel: preparation saves time, context improves the experience, and small decisions create better photos. That is what makes the Terracotta Warriors worth planning properly rather than just ticking off.