Best Photography Spots in China: Ancient Towns to Modern Skylines

China is one of the few places where you can build a single trip around visual contrast and never run out of frames. One morning can start in a stone alley with tiled roofs and red lanterns, then end beside a skyline of towers, bridges, and river reflections. The challenge is not finding something photogenic. It is choosing spots that reward good light, efficient transport, and realistic pacing.
This guide focuses on places that are strong for first-time visitors and still useful for repeat travelers: ancient towns with texture, urban skylines with depth, and routes that let you move between them without turning the trip into a logistics puzzle.
Why These Spots Stand Out
China is strongest for photography when you combine contrast: narrow old streets, reflective rivers, and high-rise skylines after sunset. The most rewarding itineraries usually pair one heritage-heavy base with one modern city, then build each day around dawn, dusk, blue hour, and the transition between them.
What makes a place photographically useful
A good photography spot is not just attractive. It also gives you repeatable angles, manageable crowds, and enough surrounding context to tell a story. In China, the best locations usually have at least one of these qualities:
- Distinct architecture that reads clearly in a wide frame.
- Water, bridges, or elevation that create reflection and depth.
- A pedestrian route that lets you move between several compositions without rushing.
- A nightlife or sunrise angle that changes the scene without changing the destination.
That matters because many travelers think they need a long list of cities when they really need a sequence of scenes. If your trip includes one old town, one riverfront, and one skyline district, you often get a better photo portfolio than if you hop between five places with no time to wait for weather or light.
The visual themes that define China best
The country’s most photogenic places tend to fall into three visual categories.
First are the ancient towns and historic quarters: Pingyao, Lijiang, Dali, Fenghuang, and similar places where roofs, walls, gates, and lanes still dominate the frame. These locations are strongest at shoulder hours, when long shadows carve out texture and the crowds thin enough for cleaner compositions.
Second are the river cities and skylines. Shanghai, Chongqing, Shenzhen, Guangzhou, and other major urban centers give you geometry, motion, and scale. They are especially good for long-exposure shots, layered reflections, and weather-driven images where mist or drizzle softens the edges of the city.
Third are the hybrid landscapes where old and new sit close together. These are the places most travelers underestimate. A city can be famous for its skyline, but its best images may come from an elevated park, a ferry crossing, a bridge approach, or a night walk several blocks away from the obvious landmark.
Best Photography Spots in China
The best photography spots in China are usually not the places with the loudest marketing. They are the ones where the visual identity survives repeated shooting from different angles and different weather conditions.
Ancient towns and old quarters
Pingyao Ancient City
Pingyao is one of the most reliable places in China for classical street photography. Its intact walls, narrow lanes, shopfronts, and traditional courtyards give you a scene that feels cohesive from almost any angle. If you want images that emphasize formality, symmetry, and old-city atmosphere, Pingyao is a strong anchor.
The best time to photograph it is early in the morning before tour groups fully arrive, and again after sunset when lantern light and shop signs add warmth. The walls themselves are also useful: they give you an elevated perspective and a sense of enclosure that helps the old city read as a complete visual system rather than a loose cluster of streets.
Lijiang Old Town
Lijiang is more atmospheric than rigid. Where Pingyao gives you disciplined geometry, Lijiang gives you water channels, bridges, rooflines, and mountain-adjacent texture. It is especially good for photographers who like layered compositions and small moments rather than only monumental frames.
The town works best if you slow down. Walk the lanes near quieter side streets, then step back to look for rooftops and water reflections. If you can get a higher viewpoint, the old town becomes much more legible as a network of roofs and canals instead of just a busy pedestrian zone. That is where the images start to feel more complete.
Dali Ancient Town
Dali is useful when you want a more open old-town feel with broader streets and mountain light in the background. It often works well for travelers who want heritage architecture without the most compressed, maze-like atmosphere. The setting is also practical because it can be combined with lakeside or mountain excursions, which gives you more variety within the same base.
Dali is not about chasing a single iconic frame. It is about creating a flexible shooting day where you can move from street textures to wider views without losing time in transit. That makes it a good choice for photographers who want both people-in-street scenes and cleaner architectural shots.
Fenghuang Ancient Town
Fenghuang is one of the most photogenic riverside towns in China because water is not just a background element there. It is part of the structure of the town. Bridges, stilted buildings, river reflections, and night lighting all work together, which means the town changes character quickly across the day.
Its strongest frames often come at dusk and after dark. The river turns the lights into a second composition layer, and the rows of buildings become more dramatic when reflected in calm water. For travelers who like warm tones, silhouettes, and a sense of intimacy, Fenghuang is a strong stop.
Why these old towns work so well
Old towns in China are successful photography destinations when the architecture remains readable at street level. You want places where the streets feel lived-in but not visually broken. That means fewer random modern intrusions in the core frame, better preservation of rooflines, and enough pedestrian flow to add life without taking over the image.
They also work because they are flexible. You can shoot details, human moments, broad streets, roofs, courtyards, and night scenes from the same neighborhood. That is rare, and it is why heritage towns remain among the best places in China for photographers who want a consistent visual story.
Modern skylines and riverfronts
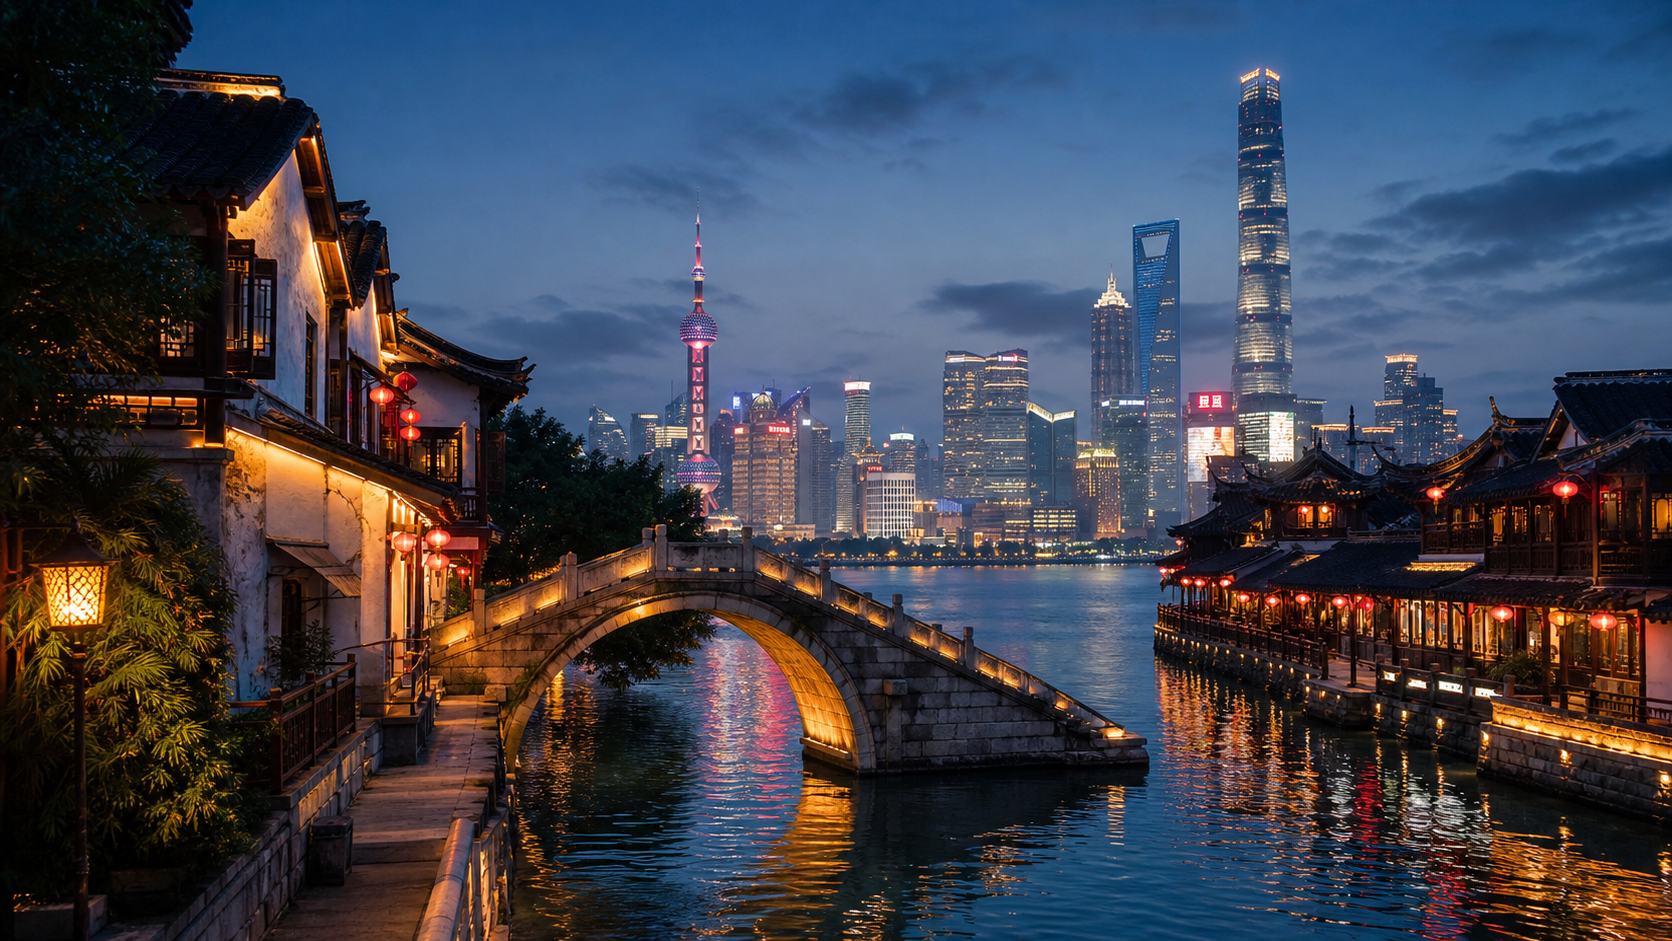
Shanghai Bund and Lujiazui
Shanghai is the obvious skyline city for a reason. It gives you one of the clearest contrasts in China between historic waterfront architecture and a dense modern financial district across the river. The Bund is useful because it frames the skyline in a way that feels instantly recognizable, while Lujiazui gives you close-up skyscraper geometry and night reflections.
If you only have one chance to photograph Shanghai, build the day around light transitions. The riverfront is good before sunset, the blue-hour window is excellent, and the city becomes dramatically more layered once the towers and ferries are lit. Long exposure works especially well here because the traffic, water, and lights all move at different speeds.
Chongqing’s layered river city
Chongqing is one of the best cities in China for dramatic verticality. It is not a skyline in the flat, polished sense that Shanghai offers. Instead, it is stacked, steep, and visually complicated. That makes it excellent for photographers who like a sense of density and scale.
The city’s strengths are the views that reveal level changes: river crossings, elevated walkways, hillside roads, and viewing platforms where one city block can sit far above another. When the weather is humid or misty, Chongqing becomes even more interesting because the city seems to fold into itself. That softens the background and lets you build mood into the image instead of only architecture.
Shenzhen and Guangzhou
Shenzhen and Guangzhou are useful if you want a cleaner, more contemporary skyline than Chongqing’s layered urban terrain. Shenzhen is especially strong for modern business-district compositions, while Guangzhou gives you riverfront depth and a skyline that can look elegant at night without feeling overproduced.
These cities are good for travelers who want controlled, orderly urban images. You can work with straight lines, wide promenades, reflective glass, and wide shots that hold up well in bright daylight. They are also practical because they are easy to combine with other parts of southern China by rail or short-haul travel.
Why skyline photography in China is different
China’s city photography works best when you stop thinking only about “famous buildings” and start thinking about spatial layers. The strongest images are often not taken from the most obvious plaza. They are taken from a river crossing, a metro exit, a hill path, a ferry deck, or a pedestrian overpass that reveals scale in an unexpected way.
That is also why weather matters so much. A clear blue sky can be useful, but haze, rain, and after-dark reflections often make the image better. In many Chinese cities, the atmosphere itself becomes part of the composition.
Pairing old towns with skyline cities
The smartest photography itinerary is often a contrast itinerary. Put an ancient town near the start of the trip so you can adjust to light, crowds, and pacing, then finish with a skyline city where you can exploit strong artificial light and more frequent transport.
For example, a trip built around Pingyao and Xi’an can give you walls, temples, and street life before you pivot to more modern cityscapes farther east. A southern route can combine Lijiang or Dali with a city like Guangzhou or Shenzhen. A river-focused route can mix Fenghuang with a larger urban center where you can photograph bridges, ferries, and night reflections.
The point is not to create a perfect theme. The point is to create a visual rhythm.
Secondary Angles That Improve the Trip
The strongest photography trips in China are rarely just about the destination names. They are about the conditions you build around those names. Timing, transport, weather, and itinerary order matter as much as the landmark itself.
Best seasons for photography
Spring and autumn are usually the easiest seasons for mixed photography trips because temperatures are more comfortable, skies are often more forgiving, and you can stay outside longer without fatigue. Autumn can be especially good for old towns and river cities because light feels softer and color palettes become richer.
Summer can still work, but it changes the game. Heat, humidity, and crowds mean you need to start earlier and take more breaks. Rain can be useful for night scenes and reflections, but it can also reduce mobility if you are trying to move between districts in one day.
Winter is underrated in some parts of China because it gives you cleaner streets, fewer crowds, and sharper architectural contrast. In northern cities or highland areas, winter light can be excellent. The tradeoff is comfort and flexibility. If you are working with a tripod or standing still for long exposures, you need to dress for more than just the forecast.
Weather is part of the composition
Many travelers treat weather as something to endure. For photographers, it is one of the main creative inputs.
Mist can make a river city look deeper. Rain can make old-town streets glow. Cloud cover can keep skylines from getting too harsh. And a little haze can simplify a busy frame by turning background buildings into layers instead of clutter.
That is why it helps to leave room in the schedule. If your whole trip depends on one sunny afternoon, you are planning around luck. If you have two mornings and a night session, you have room to choose the better conditions.
Gear that actually matters
You do not need a huge kit to make strong images in China. The more important decision is usually what kind of visual problem you want to solve.
- A wide lens is useful for old-town streets, riverfronts, and skyline scenes.
- A standard zoom is the easiest all-around choice if you want flexibility.
- A lightweight tripod helps with blue-hour and night photography, especially in cities.
- A small rain cover or microfiber cloth can matter more than an extra lens.
If you shoot mostly on a phone, you can still get excellent results. The key is to spend more time on timing and framing. In many places, a phone is enough for wide river scenes, lantern-lit streets, and skyline reflections. Composition still matters more than sensor size.
How to build a day around light
The best way to photograph China is to think in blocks.
Use early morning for streets and quiet heritage scenes. Use midday for transport, scouting, indoor breaks, or less-sensitive subjects like towers and riverfronts. Use sunset for your strongest wide compositions. Use blue hour and the first hour of darkness for skyline work.
This rhythm matters because many destinations change character dramatically over the day. An old town that feels crowded at noon can become beautiful at dawn. A skyline that looks flat in bright sun can become layered and reflective at night.
When to move, and when to stay
One of the biggest mistakes photographers make in China is overmoving. The country is large, but that does not mean your photos improve if you cross multiple provinces in a few days. In many cases, staying in one city longer produces better work because you learn where the light falls, which alleys stay quiet, and which lookout points work at different times.
Shorter trips benefit especially from staying still. If you only have five or six days, it is often smarter to pick one heritage center and one major city than to chase too many destinations. You will spend less time in transit and more time reacting to good conditions.
Practical Guide
China is highly workable for a photography trip, but the practical details are what keep the trip smooth instead of exhausting. Entry rules, payment habits, intercity rail, and local transport all matter more here than in a destination where you can improvise on arrival.
Hours, admission, and pricing
There is no single pricing model for the places in this guide. Some old towns are free to enter but charge separately for specific towers, museums, or scenic sub-areas. Others use bundled scenic-area tickets. Skyline viewpoints may be free if they are public promenades, or paid if they are tied to a tower, cruise, or observation deck.
The safest approach is to assume that:
- Historic districts may have a mix of free lanes and paid attractions.
- Riverfronts and public promenades are often free.
- Rooftop or tower viewpoints are usually ticketed.
- Night access sometimes has a separate price or time window.
Prices also shift with season and local policy. If a place is central to your itinerary, check the official ticket page before you leave the city, not after you arrive. That matters most during holidays, weekends, and evening peak hours when capacity can be controlled more tightly.
How to get there
For a photo trip, the easiest intercity strategy is usually high-speed rail. It is fast, predictable, and often more convenient than flying once you include airport transfers and baggage time. For example, rail works very well for city pairs where the trip is short enough to stay productive but long enough to justify moving.
Inside cities, mix metro, ride-hailing, walking, and ferries when available. Photography trips reward flexibility, so it helps to choose accommodation with good transit access instead of just the most scenic address. If your hotel makes it easy to leave at sunrise and return after midnight, you will get more usable shooting windows.
For larger routes, think about whether the trip is better as a loop or a one-way line. Loops reduce backtracking. One-way routes can work when you want to finish in a major city with better flight connections and stronger nightlife photography.
Entry, payment, and digital setup
If you are planning the trip now, check your eligibility for China’s evolving entry rules before booking anything nonrefundable. In late 2025, China expanded its 240-hour visa-free transit program to more ports and extended the policy to 55 eligible countries, with stays of up to 10 days for travelers transiting to a third destination. That is useful for short, tightly planned photo trips, but only if your passport and routing qualify.
Payment setup also matters. Mobile payment systems are widely used, and visitors will have the smoothest experience if they prepare before arrival rather than figuring it out mid-trip. Card acceptance is improving, but you should still keep a backup plan. A small amount of cash plus a functioning mobile payment setup gives you the best coverage for taxis, snacks, and smaller purchases.
If you want a broader trip-planning foundation for visas, payment, and rail, start with China Travel Planning: Visa, WeChat Pay, High-Speed Rail & Practical Guide. It pairs well with this article because the photography route only works if the logistics are already under control.
Building a photography-first itinerary
The easiest way to avoid wasted time is to build the itinerary from shooting goals, not from geography alone.
Ask yourself three questions:
- Do I want more heritage texture or more city-scale drama?
- Do I want to move often, or stay longer in one place?
- Do I want most of my frames at dawn and dusk, or do I need all-day flexibility?
If the answer leans heritage, choose an ancient town base and keep the city add-on limited. If the answer leans skyline, stay near a metro-heavy urban core and use the old-town stop as a contrast day rather than the center of the trip. If you want both, accept that one side of the trip may be calmer and slower by design.
When to add nature to a photo route
Urban photography gets stronger when the trip includes a change in scale. A city skyline can feel even more dramatic when it follows a landscape section, and an old town can feel more grounded when it sits between two scenic nature stops.
If you want to build a route that combines city frames with broader scenery, China's Natural Wonders: Zhangjiajie, Li River & UNESCO Nature Sites is the best companion guide. It helps you decide where a landscape detour adds value instead of just adding transit.
Tips & Common Mistakes
The biggest photography mistakes in China are usually not technical. They are planning mistakes. People arrive late, move too much, or assume the famous viewpoint is the only worthwhile angle.
What most guides miss
Most general travel guides focus on the same headline attractions and ignore the parts of a city that actually make the images better. A bridge approach, a ferry crossing, a side street with fewer signs, or a rooftop several blocks away from the obvious landmark can often produce a stronger result than the main observation deck.
They also ignore the pacing problem. Many Chinese cities are dense enough that your energy drops faster than you expect. If you are walking and shooting all day, your technical eye starts to slide. A good itinerary includes pauses, not just destinations.
Mistake 1: Arriving at the obvious time
If a place is widely known for sunset, everyone else knows that too. That means you should arrive early enough to scout and settle, or late enough to capture the scene after the biggest crowd wave has passed. Crowds are not always a problem in themselves, but they do make it harder to isolate shapes and reflections.
For old towns, early morning is often the best compromise. For skyline locations, blue hour and the first post-sunset period are usually the richest. For riverfronts, the best light may come slightly before the main sunset moment if reflections are cleaner and the sky still has structure.
Mistake 2: Treating every city like a checklist item
Some travelers try to “cover” China the way they would cover a small country. That is not how photography trips usually work here. The best images come when you stay long enough to notice repeatable patterns: where the light comes from, where the crowds thin, which side streets stay visually clean, and which transport routes let you return for a second attempt.
If you feel rushed, you probably need fewer destinations, not more. Fewer bases usually means better images.
Mistake 3: Ignoring the weather forecast
Weather in China can help or hurt a shot more than in many destinations because so much of the strongest photography depends on atmosphere. A skyline with a little mist can look powerful. An old town after rain can become reflective and warm. On the other hand, harsh midday sun can flatten details you wanted to show.
That does not mean you should only travel on perfect-weather days. It means you should know what kind of weather helps each scene and adjust the order of your days accordingly.
Mistake 4: Forgetting the backup route
Every good photo itinerary should have a fallback plan for rain, crowds, and fatigue. If your main dawn location fails, where do you go next? If the skyline is too hazy, can you switch to street detail, interior architecture, or night photography? If a historic district is packed, can you move to a quieter nearby lane and keep shooting?
The answer should be yes before you start the day.
Practical habits that improve the final set
- Scout once in daylight, then return in better light.
- Keep one flexible hour each day for weather changes.
- Shoot a wide frame, then a detail frame, then a human-scale frame.
- Build at least one evening session into every city stay.
- Leave buffer time between rail arrivals and your first photo stop.
Those habits matter because photography trips often fail not from bad destinations, but from bad timing. If you preserve your energy and keep the schedule open enough to respond to light, the same destination becomes much more productive.
FAQ
What is the best city in China for photography?
There is no single best city, but Shanghai is often the easiest answer for skyline photography, while Lijiang, Pingyao, and Fenghuang are stronger if you want old-town character. If you want the most complete trip, pair one heritage destination with one major city and leave time for both dawn and night shooting.
Are China’s ancient towns worth visiting if I already shoot cities?
Yes, because they solve a different visual problem. Modern cities give you scale, light, and geometry. Ancient towns give you texture, continuity, and human-scale streets. If you only shoot skylines, the old towns add variety. If you only shoot old towns, the skyline gives your trip a stronger visual climax.
Do I need a tripod for night photography in China?
Not strictly, but it helps. A tripod makes riverfronts, skyline reflections, and low-light streets much easier to shoot cleanly. If you do not want to carry one, you can still get good results with a steady hand, good timing, and a brighter shooting window at blue hour.
How many photography bases should I plan for one trip?
For most travelers, two bases is the sweet spot. One heritage base and one urban base usually create enough variety without wasting time on transfers. If you only have a week, three bases is already ambitious. More than that usually starts to cut into shooting time.
Is it better to focus on one region of China?
Usually yes, especially if the trip is short. China is large enough that regional focus makes the route more realistic and the images more coherent. A southern route, a river-city route, or a heritage-plus-skyline route will usually outperform a rushed cross-country itinerary.
Conclusion
The best photography spots in China are not just the famous ones. They are the places that give you a story: old lanes with texture, riverfronts with reflections, and skylines that change from day to night. When you combine those elements with good light and enough time to move deliberately, China becomes one of the most rewarding countries for travel photography.
The practical takeaway is simple. Choose fewer bases, stay longer at each one, and build the itinerary around the kind of frame you actually want to make. If you want atmosphere, lean into ancient towns. If you want scale, lean into skylines. If you want a memorable portfolio, use both and let the contrast do the work.
The more you think in terms of light, timing, and transport, the more the country opens up. The scenes are already there. The trip gets better when the schedule is designed to meet them.